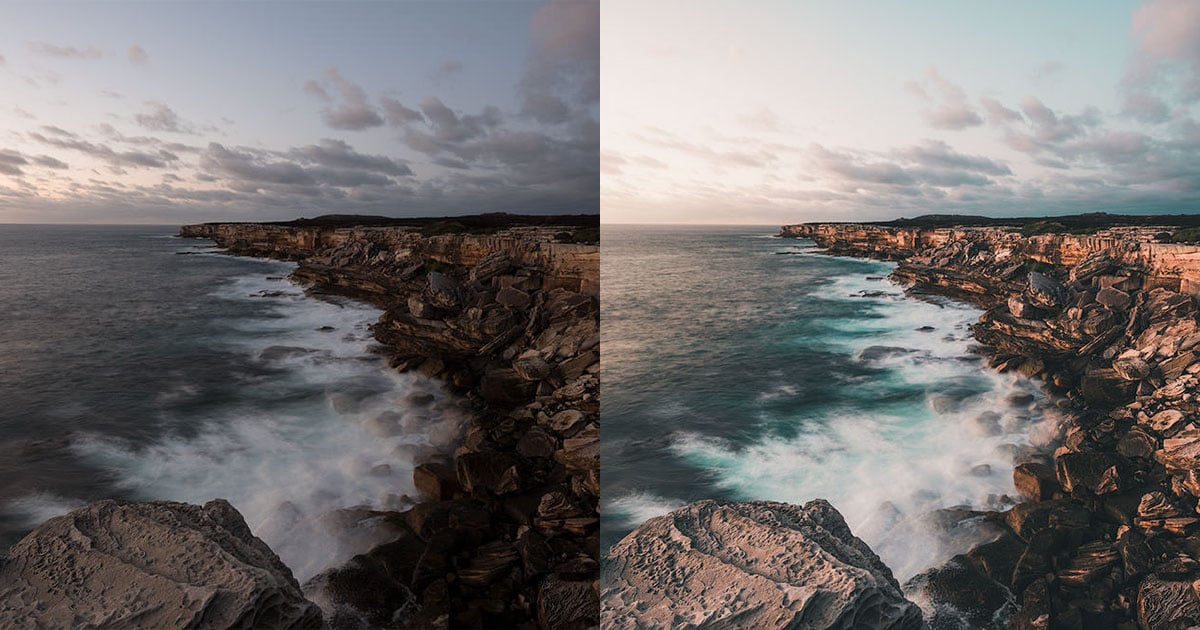
Add cinematic tone by controlling light, color grading, soft contrast, and subtle grain.
If you want to learn how to add cinematic tone photos, you’re in the right place. I’ve spent years grading images for brands and films. In this guide, I’ll break down how to add cinematic tone photos with clear steps, simple tools, and real examples you can follow today. You will learn the look, the science, and the craft behind it.

What makes a photo look cinematic
Cinematic images feel crafted, not just edited. They have soft contrast, rich color, and a clear mood. Skin tones stay natural, while shadows carry cool tones and highlights glow warm.
Here is the core recipe that works across styles:
- Gentle contrast with lifted blacks and a smooth S-curve
- Controlled color with teal shadows and warm midtones
- Clean light on the subject and darker edges for depth
- Soft detail, fine grain, and a wide cinematic crop
If you want to know how to add cinematic tone photos, start by shaping light and color. Do not chase heavy filters. Build mood with small, smart moves.

Shoot for the grade
Great grades start in camera. You need good light, clean exposure, and room to work. The better the base, the smoother the grade.
Try these steps on set:
- Choose soft light. Golden hour, shade, or diffusion all help.
- Expose for the highlights. Keep bright spots safe, then lift shadows later.
- Use a flat picture style. It holds more detail for grading.
- Set white balance by hand. Avoid auto shifts across a set.
- Use a diffusion filter like a 1/8 Black Pro-Mist if you have it.
- Frame for story. Place your subject in layers and lead the eye.
This approach makes how to add cinematic tone photos much easier later. Grading cannot fix hard, messy light.
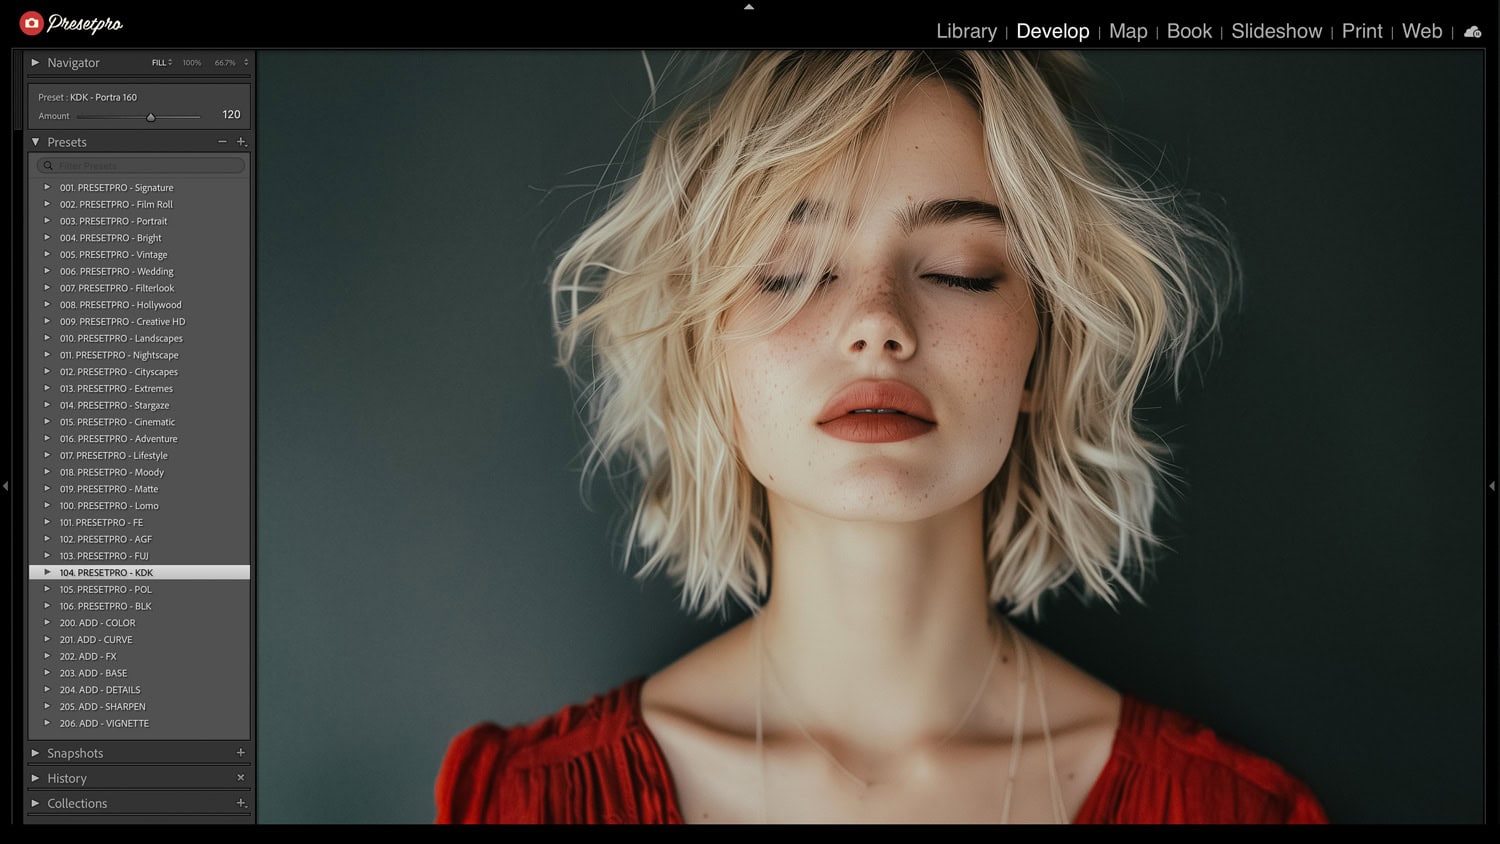
How to add cinematic tone photos in Lightroom Classic
This is a fast, reliable workflow. It works on portraits, street, and travel. I use it when I need a clean filmic look in minutes.
Step-by-step:
- Crop and straighten
- Try 2.39:1 or 16:9 for a wide frame. It feels like cinema.
- Set the base
- Adjust exposure. Keep highlights just under clipping.
- Lower contrast a little. Lift shadows a touch. Pull whites down if needed.
- Tone Curve
- Add a slight S-curve. Lift the black point a bit for soft blacks.
- Keep midtones smooth. Avoid harsh jumps.
- Color Mixer
- Skin tones: shift orange hue slightly toward red; lower saturation a touch.
- Background: push aqua/blue hue toward teal; reduce their luminance a bit.
- Color Grading
- Shadows: add teal (around 190–210 degrees).
- Midtones: add warm orange (30–40 degrees).
- Highlights: warm, but subtle. Keep skin clean.
- Calibration (power move)
- Nudge Blue Primary hue left. Reduce Blue Primary saturation a little.
- This adds that teal film vibe without wrecking skin.
- Local masks
- Subject: raise exposure 0.2–0.4 and add a touch of warmth.
- Background: darken slightly and cool it. Instant depth.
- Texture and Clarity
- Lower clarity a little. Raise texture on key details only.
- Effects
- Add fine grain (10–25). Keep size small.
- Add a soft vignette to draw the eye.
- Final check
- Toggle before/after. If you see blue skin, reduce aqua/blue mix.
Do this a few times and you will feel how to add cinematic tone photos with confidence. Save your best result as a preset for speed.

How to add cinematic tone photos in Photoshop
Photoshop gives more control. It is great for tricky skin or complex composites.
Use this stack:
- Camera Raw Filter
- Do the same base steps as Lightroom: exposure, curve, color grading.
- Curves
- Create a soft S-curve. Lift blacks a hair. Lock skin in the midtones.
- Selective Color
- Shadows: add cyan and blue for teal depth.
- Neutrals: small tweaks only to keep balance.
- Reds: refine skin without oversaturation.
- Gradient Map
- Choose a dark teal to warm cream map.
- Set blend mode to Soft Light or Color. Lower opacity to taste.
- Color Lookup (LUTs)
- Try a film LUT at 10–30% opacity. Stack two if needed.
- Dodge and Burn
- Lift faces and eyes a touch. Darken edges to frame the subject.
This is my go-to when clients ask how to add cinematic tone photos with high control and natural skin.
How to add cinematic tone photos on mobile
You can get a strong film look on your phone. Use Lightroom Mobile or Snapseed.
Lightroom Mobile:
- Basic: set exposure and white balance by hand.
- Curve: soft S-curve with lifted blacks.
- Color Mix: protect orange skin, cool aqua/blue.
- Color Grading: teal shadows, warm midtones.
- Effects: add small grain and a soft vignette.
Snapseed:
- Tune Image for exposure.
- Curves for contrast.
- Glamour Glow at a very low amount for halo bloom.
- Grainy Film for texture, then reduce strength.
- Brush tool to warm faces only.
This path is perfect if you search how to add cinematic tone photos without a desktop app.
Color science, LUTs, and why teal and orange works
Cinematic grades lean on color contrast. Warm skin sits opposite cool shadows on the color wheel. The eye loves this balance. It feels rich and real.
LUTs can speed up results. Use technical LUTs to convert log to a working space, then creative LUTs for style. For stills, apply LUTs in Photoshop or apps that support 3D LUTs. If you need cross-app consistency, keep a fixed white balance and a repeatable curve. This helps when you test how to add cinematic tone photos across many shoots.
Keep this rule: skin first, style second. If skin breaks, pull back.
Composition, light, and story
Cinematic tone is not only color. It is story. You guide the eye and set mood with shape and space.
Try these ideas:
- Subject separation with light or depth.
- Leading lines and foreground layers for depth.
- Negative space for calm and tension.
- Backlight for glow. Edge light for shape.
When I coach teams on how to add cinematic tone photos, I start with light and layout. Edits come after.
Common mistakes when you add a cinematic look
Take care with these traps:
- Blue or green skin. Fix your aqua/blue mix and grading balance.
- Crushed blacks. Lift the black point to keep detail.
- Heavy clarity or grain. Keep it subtle.
- Oversaturated teal. Reduce saturation and use curves to control contrast.
- Cool highlights. Keep warmth in highlights so skin stays alive.
Small, smart moves win. That is the heart of how to add cinematic tone photos that feel premium.
A repeatable workflow checklist
Use this checklist on every edit:
- Set exposure. Protect highlights.
- Add gentle S-curve. Lift blacks.
- Balance white balance.
- Grade: teal shadows, warm midtones, soft highlights.
- Fix skin with Color Mixer or Selective Color.
- Mask subject brighter, background darker.
- Add fine grain and a soft vignette.
- Wide crop if it helps the scene.
- Final check on different screens.
Follow this and you will master how to add cinematic tone photos in a steady, repeatable way.
Frequently Asked Questions of how to add cinematic tone photos
What camera settings help the most?
Use a low ISO, shoot RAW, and expose for highlights. Set white balance by hand to keep color steady.
Do I need LUTs to get a cinematic look?
No. You can get great results with curves and color grading. LUTs are helpful for speed and consistency.
How do I make teal and orange without ruining skin?
Keep orange tones close to natural and push teal only in shadows. Use local masks to protect faces.
Can I learn how to add cinematic tone photos without Lightroom or Photoshop?
Yes. Try Lightroom Mobile or Snapseed with curves and color tools. The same steps apply in most apps.
Why do my photos look flat after grading?
You may have lowered contrast too much or muted midtones. Add a gentle S-curve and refine local contrast.
What export settings should I use for web?
Export JPEG, sRGB, and 80–90% quality. Resize to your platform’s ideal width to keep files light.
Conclusion
Cinematic tone is a craft of small, precise choices. Shape light, guide color, protect skin, and build depth. With a steady workflow, you can master how to add cinematic tone photos on any device. Start with one image today, save your settings, and refine your eye with each edit. Want more tips and presets? Subscribe, share your results, or ask a question in the comments.