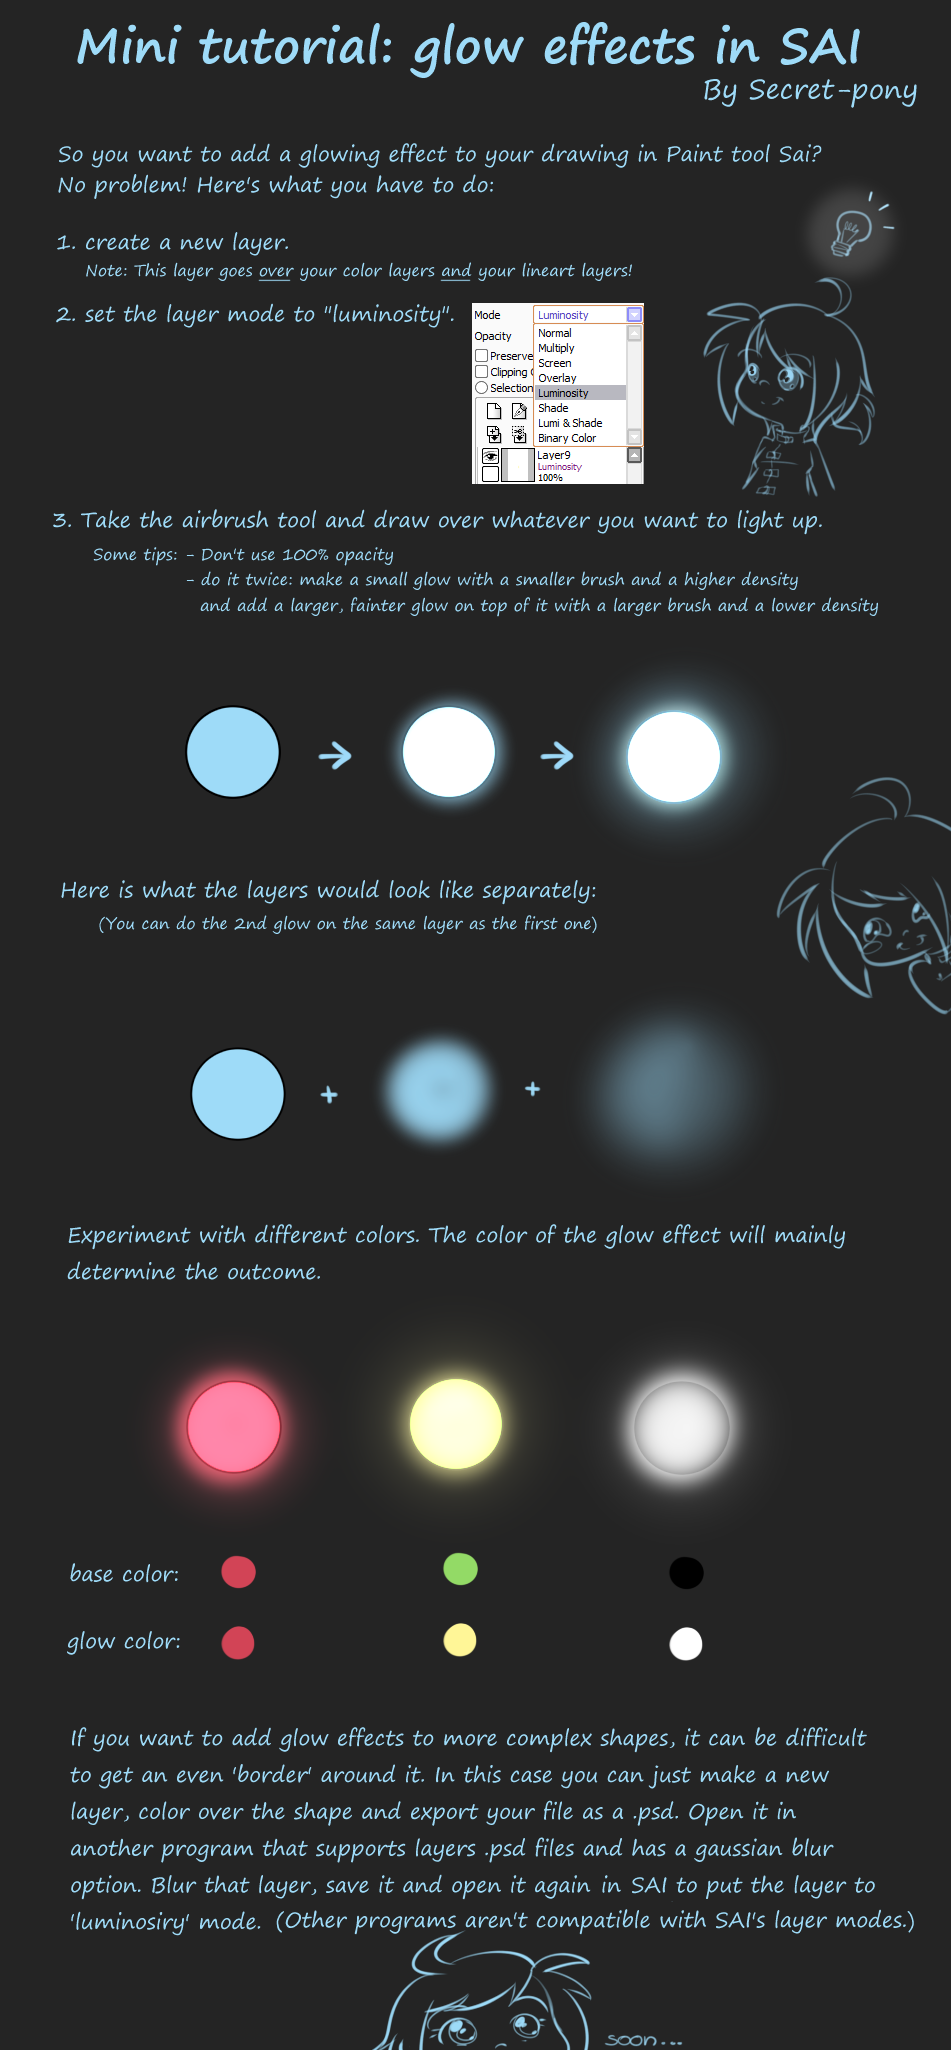
Blend soft light, blur, and selective masks to make photos glow fast.
You want a clear, repeatable way to create that dreamy glow. I’ve spent years teaching retouching for brands and creators. In this guide, I break down how to add glow effects photos on phone, desktop, and online tools. You will learn pro steps, smart presets, and the small tips that make your glow look natural, not fake.
What a glow effect does and when to use it
A glow effect adds soft light and bloom around bright parts. It lifts highlights and wraps light around edges. It also reduces hard contrast and adds a light haze.
Use it when you want warmth, magic, or soft focus. It suits portraits, sunsets, city lights, and product shots. If you search how to add glow effects photos, you want a fast way and a clean result.
Core principles for a natural glow
Before you edit, know the basics. These ideas guide every tool and app.
- Source of light matters. Glow should sit where light is in the scene.
- Color rules the mood. Warm glow feels cozy. Cool glow feels modern.
- Radius equals softness. Big blur equals broad glow. Small blur equals tight bloom.
- Blend modes change strength. Screen and Linear Dodge add bright, airy glow.
- Contrast control keeps detail. Lift glow but protect blacks and mid-tones.
These rules help with how to add glow effects photos in any editor. They also keep the result real and clean.

Step-by-step on phone apps
You can get a pro glow with free apps. Try Snapseed, Lightroom Mobile, or PicsArt. Here is a simple flow that works in most apps.
Snapseed method
- Open the photo. Duplicate edits with Stacks later if you need.
- Use Tune Image. Lift Highlights. Drop Contrast a bit.
- Add Glamour Glow. Set Glow around 30 to 50. Adjust Saturation to taste.
- Mask the effect off eyes, text, or sharp edges.
- Add a Radial blur or Vignette for focus.
Lightroom Mobile method
- Use Mask. Add Radial Gradient around the light source.
- Increase Exposure a little. Warm the Temp if you want a golden glow.
- Lower Texture and Clarity for soft bloom.
- Add Color Grading. Push Highlights toward warm hues.
- Keep Blacks anchored so the image does not look foggy.
PicsArt method
- Use Effects. Pick Glow or Soft Light.
- Lower the Strength to keep detail.
- Add a Brush mask to remove glow from skin texture or text.
If you wondered how to add glow effects photos fast, this mobile flow is a safe start. It is easy to repeat on a batch of images too.

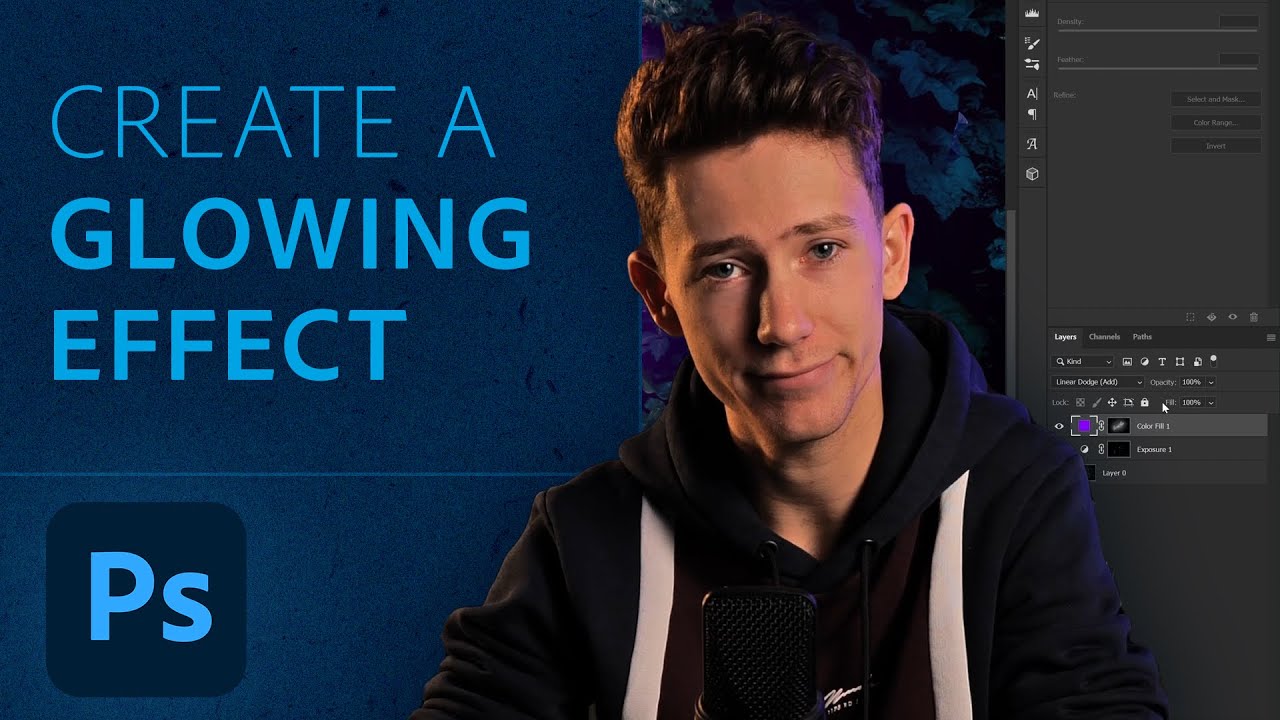
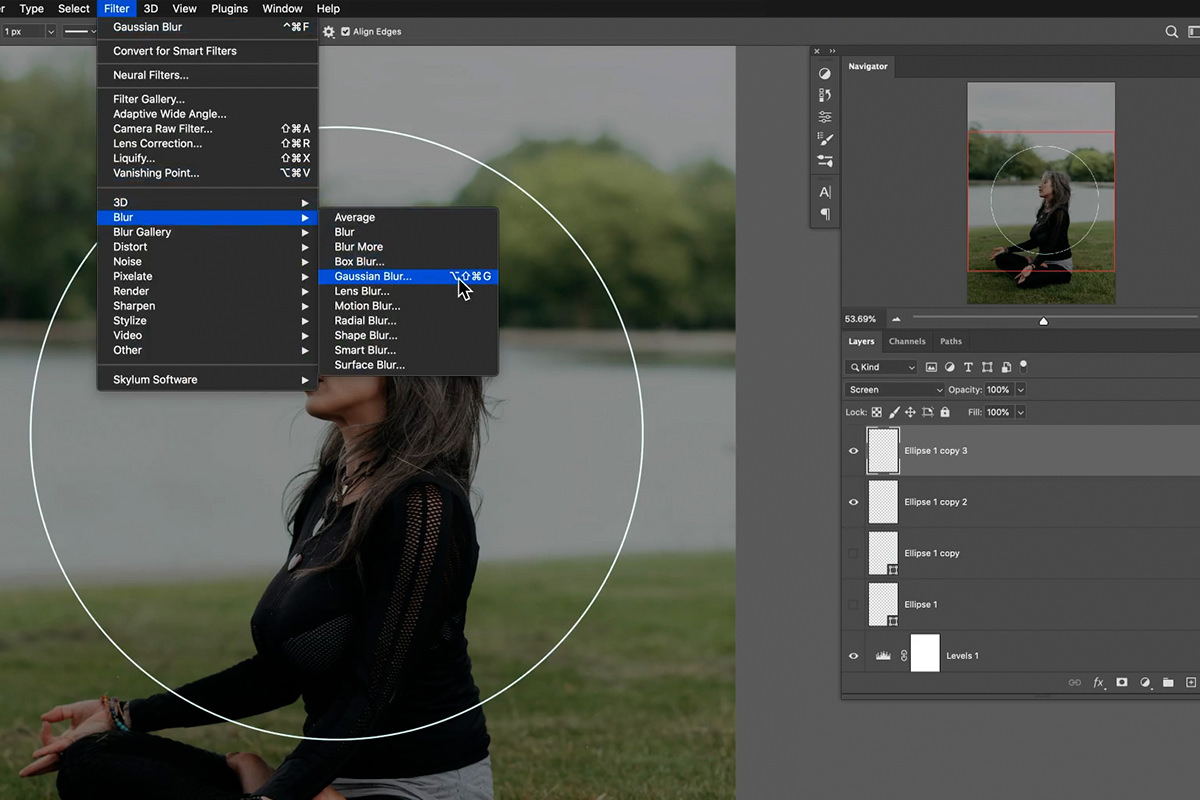
Step-by-step in Photoshop
Photoshop gives the best control. This is my go-to method for clean bloom with detail.
Base bloom layer
- Duplicate the Background layer.
- Apply Gaussian Blur. Start at 10 to 25 px for portraits. Use more for landscapes.
- Change the blend mode to Screen. Lower Opacity to 20 to 50 percent.
- Add a black mask. Paint white where you want glow. Hit highlights and light edges.
Brighten the brightest parts
- Create a new layer. Set it to Linear Dodge (Add).
- Use a soft brush at low Flow. Sample a warm color from the light.
- Paint small strokes near light sources. Keep it subtle.
Protect detail
1. Add a Curves adjustment under the glow layers.
2. Pin the Blacks so they do not lift too much.
3. Add a second Curves above. Add a mild S-curve to bring back mid-tone contrast.
Color finesse
- Use Selective Color on Whites. Add a little Yellow and Magenta for golden light.
- Use Color Balance in Highlights. Warm them a touch.
Final mask cleanup
- Zoom in. Erase glow from eyes, nostrils, and hair detail.
- If the face looks hazy, add a low-opacity dodge on the iris catchlights.
This stack is the pro core of how to add glow effects photos in Photoshop. Save it as an Action for speed.
Step-by-step in Lightroom or Camera Raw
Lightroom has no layers, but you can still get a soft glow. Use masks and smart blur tools.
Local masks
- Add a Radial mask where the light lives.
- Lift Exposure slightly. Lower Texture and Clarity.
- Add a little Dehaze to the left for soft bloom.
Lens Blur tool
- Open Lens Blur. Pick a shallow preset.
- Increase the Bloom or Cat’s Eye to taste if your version has it.
- Keep faces sharp with the Subject mask.
Color grading
- In Color Grading, push Highlights toward warm tones.
- Balance toward Highlights. Keep Saturation low for a natural look.
Finish
- Add a Vignette or use a mask to darken edges.
- Check Histogram. Protect whites from clipping.
If you are learning how to add glow effects photos without Photoshop, this method is clean and quick.
Step-by-step online with free tools
You can do this in a browser using Photopea or Canva.
Photopea
- Open your file. Duplicate the layer.
- Filter. Blur. Gaussian Blur. Pick a mild value.
- Set blend mode to Screen. Lower Opacity.
- Add a Layer Mask. Paint glow only where you want it.
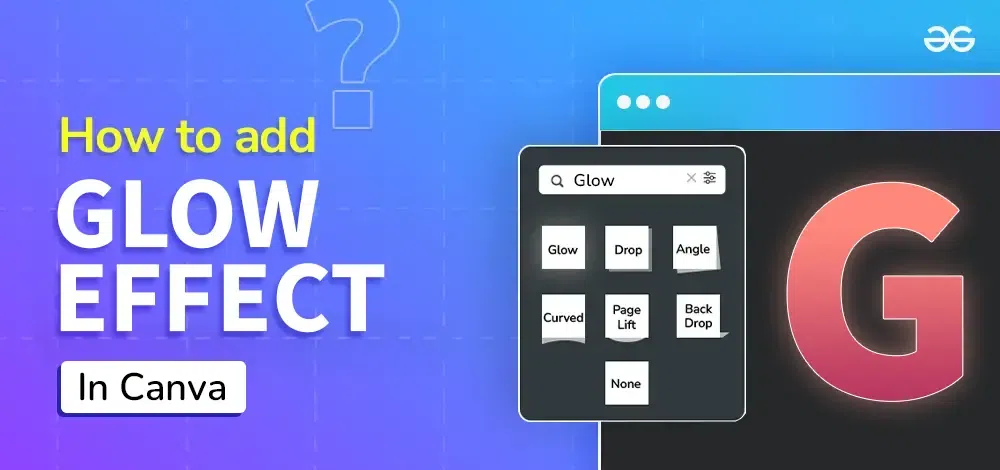
Canva
- Add your photo to a canvas.
- Use Adjust. Increase Highlights a little. Lower Clarity if available.
- Add a Glow Shadow to objects or text. Set Blur high. Set Transparency low.
- Duplicate the image layer, apply a soft blur, and lower Opacity to fake bloom.
For quick posts, this is a no-fuss way for how to add glow effects photos online.
Advanced glow styles and use cases
Here are styles I use in client work, with quick recipes.
Golden hour portrait
- Warm the White Balance.
- Add a Radial mask behind the head. Lift Exposure.
- Add Screen blur layer if in Photoshop. Paint around hair edges.
Neon nights
- Use Linear Dodge (Add) on painted strokes that match sign colors.
- Add a small Inner Glow on objects near the light.
- Cool the shadows and warm the highlights for color contrast.
Sun flare on landscapes
- Add a small circular brush stroke on a Linear Dodge layer.
- Blur it. Lower Opacity. Mask it to sit behind trees or edges.
- Use Color Grading to warm the Highlights.
Product shots
- Use Screen blur on edges to soften reflections.
- Mask off logos to keep sharp.
- Add a tight-radius glow for trim lights.
Cinematic bloom
- Use a large blur Screen layer at low Opacity.
- Add Film Grain. Pull down Blacks for mood.
- Keep skin highlights under control.
In every case, keep asking how to add glow effects photos without losing detail. That question keeps you from overdoing it.

Common mistakes and how to fix them
Here are the pitfalls I see most. I made them too, early on.
- Over-blur everywhere. Fix by masking glow on key areas only.
- Washed-out blacks. Fix with a Curves anchor on Shadows.
- Wrong color. Fix by sampling light in the scene and matching it.
- Hazy eyes and teeth. Fix by removing glow on those spots.
- Banding in skies. Fix with slight Noise or Grain and 16-bit edits.
When you ask how to add glow effects photos and keep it pro, these checks help.
A fast workflow and presets that work
Use this simple checklist for each edit.
- Decide the light source and glow radius.
- Add base bloom. Screen plus blur or local mask.
- Restore contrast. Small S-curve or Blacks anchor.
- Match color. Warm or cool per the scene.
- Mask details back in. Eyes, text, logos.
Starter preset ideas
- Portrait glow. Blur radius 15 px. Screen 30 percent. Warm highlights +5.
- Sunset glow. Radial mask. Exposure +0.3. Dehaze −10. Warm highlights +10.
- Neon city. Linear Dodge paint with sampled neon color. Opacity 10 to 20 percent.
Save and test on three very different files. If it works on all three, keep it. This is how to add glow effects photos at speed while staying consistent.
Frequently Asked Questions of how to add glow effects photos
What is the fastest way to add glow on a phone?
Use Snapseed’s Glamour Glow and a mask. Keep the strength low and protect eyes and text.
Which blend mode works best for glow?
Screen is the safest start. Linear Dodge (Add) is stronger and great for lights and neon.
How do I avoid a fake, hazy look?
Mask the glow to highlights only. Hold contrast with a mild S-curve or black point.
Can I do this without Photoshop?
Yes. Lightroom masks, Photopea in the browser, and Snapseed on mobile all work well.
What settings work for portraits?
Small blur, low opacity, and warm highlights. Remove glow from eyes, nostrils, and hair detail.
How do I match glow color to my scene?
Sample the highlight color with the eyedropper. Paint glow with that tone on a low-opacity layer.
Why does my sky band after adding glow?
Large smooth areas can band. Add slight noise or grain and work in 16-bit if you can.
Conclusion
Glow is simple when you control light, color, and masks. Start small, match the scene, and protect detail. That is the path to a clean, modern glow that fits any style.
Try one method today on a favorite photo. Save a preset and refine it on three more files. If this helped you master how to add glow effects photos, subscribe for more pro guides, ask a question, or share your results.