Use a bright source, masked beams, blur, and screen blend for depth.
You want your image or video to glow with believable beams that guide the eye and add drama. This guide shows how to add light ray effects across Photoshop, After Effects, Blender, and mobile apps, with clear steps, pro tips, and real examples. I have spent years shaping light in post and on set, and I’ll show you how to add light ray effects the right way—fast, clean, and realistic.
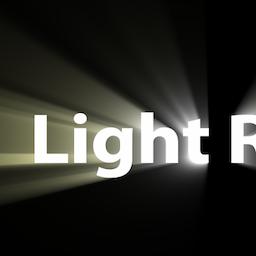
What Are Light Ray Effects?
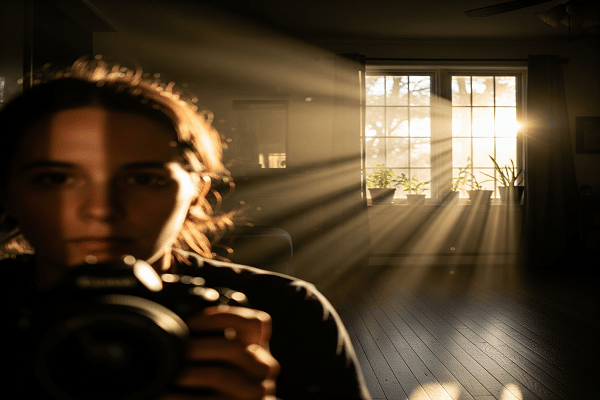
Light ray effects simulate beams of light as they pass through air, dust, fog, or smoke. In the real world, this is called volumetric light or god rays. You see it at sunset, in forests, in cathedrals, and on foggy streets.
In design, these effects can add depth, mood, and focus. The trick is to link rays to a real source. Rays must fade with distance, soften at the edges, and react to objects in the scene. That is how to add light ray effects that look natural.

Planning Before You Add Rays
Plan the light before you start. It saves time and gives better results.
- Pick a clear source. A sun, window, lamp, or neon sign works well.
- Set the angle. Side angles reveal fog better than flat front light.
- Add a medium. Think dust, mist, rain, or steam for visible rays.
- Shape the path. Slats, blinds, trees, or door frames cut the beam into shafts.
- Protect highlights. Keep whites under control so detail holds after the edit.
If you want to know how to add light ray effects that feel real, start with a solid plan.

How to Add Light Ray Effects in Photoshop (Step-by-Step)
Here is a proven workflow I use for still images. It is fast and non-destructive.
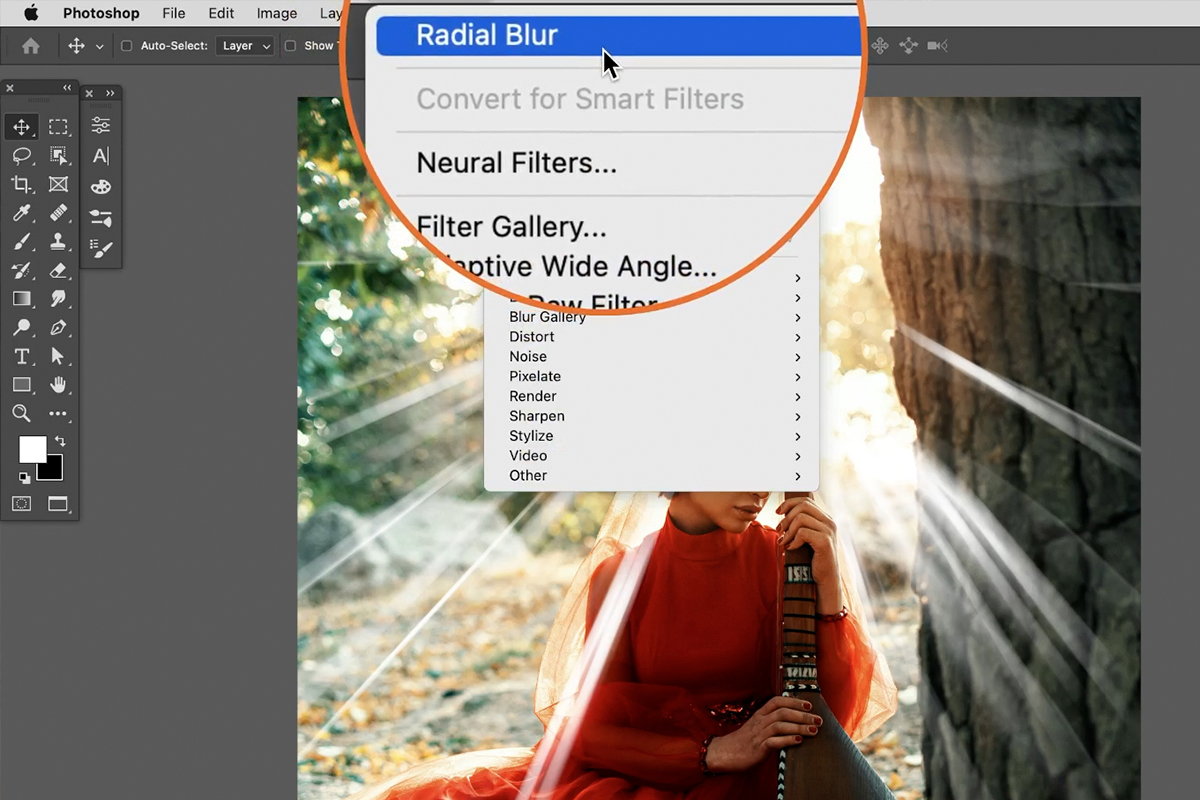
Method 1: Masked Rays with Radial Blur
- Duplicate the layer. Convert to a Smart Object.
- Make a rough mask around the light source and paths for rays.
- Fill the masked area with white on a new layer above.
- Apply Filter > Blur > Radial Blur. Choose Zoom. Set the center to the light source.
- Set blend mode to Screen or Linear Dodge (Add). Lower opacity.
- Add a layer mask. Paint with a soft black brush to hide hard edges.
- Add a slight Gaussian Blur for softness. Use Noise at 0.5–1% to reduce banding.
Method 2: Luminance-Based Rays
- Make a copy of the image. Desaturate it.
- Use Levels to crush blacks and lift highlights. You want bright shapes where rays should form.
- Apply Radial Blur or Motion Blur to stretch highlights along the light direction.
- Blend on top with Screen. Mask to taste. This ties rays to real bright spots.
Method 3: Rays from Gradients and Shapes
- Create a new blank layer above all.
- With the Polygonal Lasso, draw thin wedges from the source.
- Fill with white. Blur with Motion Blur in the ray direction.
- Set layer to Screen. Randomize width and strength for a natural look.
Finishing Touches
- Use a Curves adjustment to give rays a soft fade with distance.
- Color the rays with a Hue/Saturation colorize or a Gradient Map.
- Add particles. Paint tiny white dots, then blur and fade.
- Keep highlights safe. Use blend-if or a luminosity mask to stop clipping.
Pro tip from experience: less is more. If you ask how to add light ray effects without making them look fake, lower opacity, increase feather, and keep edges soft. Push color into the midtones, not the whites.
How to Add Light Ray Effects in After Effects and Premiere Pro
For motion, tie rays to the source and to camera movement.
After Effects: Fast Workflow
- Add an Adjustment Layer above your clip.
- Apply CC Light Rays or CC Radial Fast Blur.
- Set the Center to your light source. Animate it if the camera moves.
- Change Transfer Mode to Screen if needed. Lower Intensity.
- Add a Mask on the Adjustment Layer to confine the rays.
- Use a Luma Key or Set Matte to link rays to bright areas only.
- Add Noise at 1–2% to kill banding. 16-bit or 32-bit color helps.
After Effects: Cinematic Volumetrics
- Create a Light in a 3D comp. Add a Solid with a Fractal Noise for fog.
- Use a plug-in volumetric light if available, or stack Fast Box Blur with Light Rays.
- Occlude rays with masks or track mattes from scene objects.
- Use color temperature. Warm indoor light, cool night shafts.
Premiere Pro: Simple Edit
- Add the Transform effect for position control.
- Use Lumetri to raise highlights in bright zones.
- Add a third-party Light Rays effect, or stack Directional Blur on a duplicate, then Screen.
- Mask and feather. Track the mask to the source.
This is how to add light ray effects in video while keeping speed and control.

How to Add Light Ray Effects in Blender (3D)
3D gives you true volumetric light. It is the most realistic way when you can render.
True Volumetrics in Cycles or Eevee
- In the World or a Cube, add a Volume Scatter shader. Set density low, like 0.02–0.1.
- Add a Sun or Spot Light. Angle it through objects to shape beams.
- In Eevee, enable Volumetrics in Render settings. Raise samples to reduce noise.
- Use a Volume Object to localize fog so the whole scene does not fill with haze.
- Render in higher bit depth to avoid banding.
Sun Beams in the Compositor
- Enable Use Nodes. Add the Sun Beams node.
- Set the Source vector to your light position.
- Tweak Ray Length. Mix over the render with a Screen blend.
When clients ask how to add light ray effects that match on-set lighting, I often render a subtle volume pass and composite it over the plate. It blends fast and looks real.

Mobile Workflow: How to Add Light Ray Effects on Phone
You can do this on a phone in minutes.
Snapseed
- Open the photo. Use the Brush or Selective tool to define bright zones.
- Add Lens Blur for depth, then use Curves for contrast.
- In Double Exposure, add a white gradient wedge image and rotate it to match the light. Blend with Screen.
- Erase extra parts with masking inside Snapseed.
Lightroom Mobile
- Use the Radial Gradient over the source.
- Increase Exposure and Dehaze negative for a soft glow.
- Add a Linear Gradient in the beam direction to pull a long fade.
PicsArt or CapCut
- Use overlays of light beams. Set blend to Screen.
- Mask with a soft brush. Lower opacity.
- Add a little grain to hide banding.
This is how to add light ray effects on the go when speed matters.

Photographic Approach: Capture to Reduce Post Work
If you can shape light on set, do it there first.
- Add haze. A fog machine or even a haze spray makes rays show up.
- Use flags or blinds to cut the beam into shafts.
- Shoot at an angle to the light. Side light reveals more texture.
- Expose for highlights. Keep detail so your edit holds up.
- Add dust. Throw chalk dust or mist water for sparkle if safe.
Doing this will make how to add light ray effects in post much easier and more natural.

Style, Color, and Realism Tips
Rays should honor physics and story.
- Color temperature matters. Warm rays feel cozy. Cool rays feel eerie.
- Fade with depth. Use masks and gradients for a natural falloff.
- Respect occlusion. Rays cannot pass through walls or solid props.
- Edge softness is key. Hard edges scream fake.
- Keep contrast modest. High contrast rays can crush detail.
When I teach how to add light ray effects, I ask students to study reference shots. Nature is the best teacher.

Troubleshooting and Common Mistakes
- Rays not tied to a source. Anchor the origin exactly.
- Overexposed whites. Use blend-if, HDR color, or curves to protect detail.
- Flat rays. Add depth fade and slight noise or grain.
- Wrong direction. Match the cast shadows every time.
- Banding. Work in 16-bit or 32-bit and add 1–2% noise.
Follow these and you will master how to add light ray effects with confidence.
Frequently Asked Questions of how to add light ray effects
What is the fastest way to add light rays in Photoshop?
Use Radial Blur on white wedges from the source and blend with Screen. Mask and blur edges for a soft, natural look.
How do I match ray direction to my scene?
Look at shadow angles. Rays should run along the same path as the light that casts those shadows.
How can I stop banding in smooth beams?
Work in 16-bit or 32-bit color and add a small amount of noise. A tiny blur also helps smooth steps.
What settings make rays look real in video?
Keep intensity low, add noise, and link rays to luma so they react to bright areas. Mask and track the source if it moves.
Can I create rays without fog?
Yes, but fog or dust helps. In post, mimic fog by adding soft gradients, low-contrast glow, and depth fades.
Are lens flares the same as light rays?
No. Flares are optical artifacts on the lens. Rays are beams in the air from light scattering.
Which apps are best on mobile?
Use Snapseed, Lightroom Mobile, PicsArt, or CapCut. They support overlays, masks, and soft blends for clean rays.
Conclusion
You now know how to add light ray effects with clear steps, from stills to motion and from desktop to mobile. Tie your rays to a source, match direction, add depth fade, and keep opacity low for realism. Small tweaks make a big impact.
Start with one image today. Add a masked beam, blur it, and blend it. Then refine color and fade. Share your result, ask for feedback, and keep going. Want more guides like this? Subscribe and drop your questions in the comments.